iTerm2 is a replacement for Terminal and the successor to iTerm. It works on Macs with macOS 10.14 or newer. iTerm2 brings the terminal into the modern age with features you never knew you always wanted.
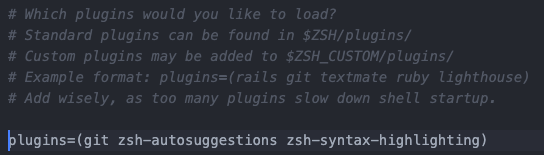
Add the plugin to the list of plugins for Oh My Zsh to load (inside ~/.zshrc)
nano ~/.zshrc

plugins=(git zsh-autosuggestions)
Start a new terminal session.
Install zsh-syntax-highlighting using Oh-my-zsh (Preferred)
This package provides syntax highlighting for the shell zsh. It enables highlighting of commands whilst they are typed at a zsh prompt into an interactive terminal. This helps in reviewing commands before running them, particularly in catching syntax errors.
Clone this repository in oh-my-zsh’s plugins directory:
Second option: Install zsh-syntax-highlighting using Homebrew on Mac M1
The new Macs with M1 chip use the arm64 CPU architecture. Rosetta 2 is an emulator built into macOS Big Sur that allows ARM Macs to run the old intel applications. To install Homebrew on Mac M1, run the installation command with the arch -x86_64 prefix:
The command will run the default homebrew installer and set up it in the /usr/local directory. So whenever you need to do something with brew again, you just need to put before arch -x86_64:
There are four fundamental elements in the Git Workflow. Working Directory, Staging Area, Local Repository and Remote Repository.
If you consider a file in your Working Directory, it can be in three possible states.
It can be staged. Which means the files with with the updated changes are marked to be committed to the local repository but not yet committed.
It can be modified. Which means the files with the updated changes are not yet stored in the local repository.
It can be committed. Which means that the changes you made to your file are safely stored in the local repository.
git add is a command used to add a file that is in the working directory to the staging area.
git commit is a command used to add all files that are staged to the local repository.
git push is a command used to add all committed files in the local repository to the remote repository. So in the remote repository, all files and changes will be visible to anyone with access to the remote repository.
git fetch is a command used to get files from the remote repository to the local repository but not into the working directory.
git merge is a command used to get the files from the local repository into the working directory.
git pull is command used to get files from the remote repository directly into the working directory. It is equivalent to a git fetch and a git merge .
git --version
git config --global --list
Check your machine for existing SSH keys:
ls -al ~/.ssh
If you already have a SSH key, you can skip the next step of generating a new SSH key
Generating a new SSH key and adding it to the ssh-agent
When adding your SSH key to the agent, use the default macOS ssh-add command. Start the ssh-agent in the background:
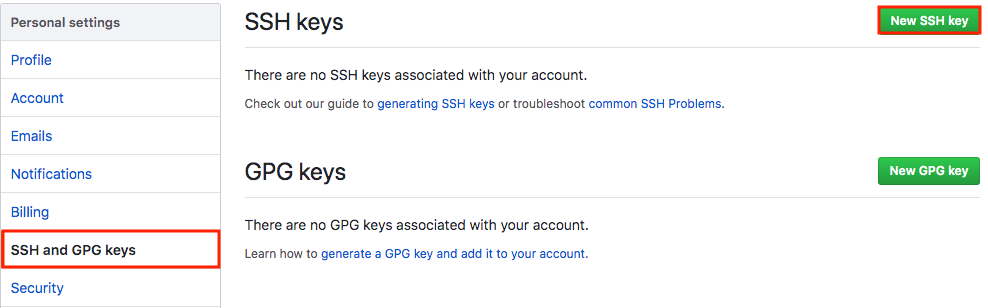
Adding a new SSH key to your GitHub account
To add a new SSH key to your GitHub account, copy the SSH key to your clipboard:
pbcopy < ~/.ssh/id_rsa.pub
Copy the In the “Title” field, add a descriptive label for the new key. For example, if you’re using a personal Mac, you might call this key “Personal MacBook Air”.
Paste your key into the “Key” field.
After you’ve set up your SSH key and added it to your GitHub account, you can test your connection:
ssh -T git@github.com
Let’s Git
Create a new repository on GitHub. Follow this link. Now, locate to the folder you want to place under git in your terminal.
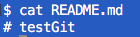
echo "# testGit" >> README.md
Now to add the files to the git repository for commit:
git add .
git status
Now to commit files you added to your git repo:
git commit -m "First commit"
git status
Add a remote origin and Push:
Now each time you make changes in your files and save it, it won’t be automatically updated on GitHub. All the changes we made in the file are updated in the local repository.
To add a new remote, use the git remote add command on the terminal, in the directory your repository is stored at.
The git remote add command takes two arguments:
A remote name, for example, origin
A remote URL, for example, https://github.com/user/repo.git
Once you start making changes on your files and you save them, the file won’t match the last version that was committed to git.
Let’s modify README.md to include the following text:
To see the changes you just made:
git diff
Markers for changes
--- a/README.md
+++ b/README.md
These lines are a legend that assigns symbols to each diff input source. In this case, changes from a/README.md are marked with a --- and the changes from b/README.md are marked with the +++ symbol.
Diff chunks
The remaining diff output is a list of diff ‘chunks’. A diff only displays the sections of the file that have changes. In our current example, we only have one chunk as we are working with a simple scenario. Chunks have their own granular output semantics.
Revert back to the last committed version to the Git Repo:
Now you can choose to revert back to the last committed version by entering:
git checkout .
View Commit History:
You can use the git log command to see the history of commit you made to your files:
Now you can work on the files you want and commit to changes locally. If you want to push changes to that repository you either have to be added as a collaborator for the repository or you have create something known as pull request. Go and check out how to do one here and give me a pull request with your code file.
So to make sure that changes are reflected on my local copy of the repo:
git pull origin master
Two more useful command:
git fetch
git merge
In the simplest terms, git fetch followed by a git merge equals a git pull. But then why do these exist?
When you use git pull, Git tries to automatically do your work for you. It is context sensitive, so Git will merge any pulled commits into the branch you are currently working in. git pullautomatically merges the commits without letting you review them first.
When you git fetch, Git gathers any commits from the target branch that do not exist in your current branch and stores them in your local repository. However, it does not merge them with your current branch. This is particularly useful if you need to keep your repository up to date, but are working on something that might break if you update your files. To integrate the commits into your master branch, you use git merge.
Pull Request
Pull requests let you tell others about changes you’ve pushed to a GitHub repository. Once a pull request is sent, interested parties can review the set of changes, discuss potential modifications, and even push follow-up commits if necessary.
null
Pull requests are GitHub’s way of modeling that you’ve made commits to a copy of a repository, and you’d like to have them incorporated in someone else’s copy. Usually the way this works is like so:
Lady Ada publishes a repository of code to GitHub.
Brennen uses Lady Ada’s repo, and decides to fix a bug or add a feature.
Brennen forks the repo, which means copying it to his GitHub account, and clones that fork to his computer.
Brennen changes his copy of the repo, makes commits, and pushes them up to GitHub.
Brennen submits a pull request to the original repo, which includes a human-readable description of the changes.
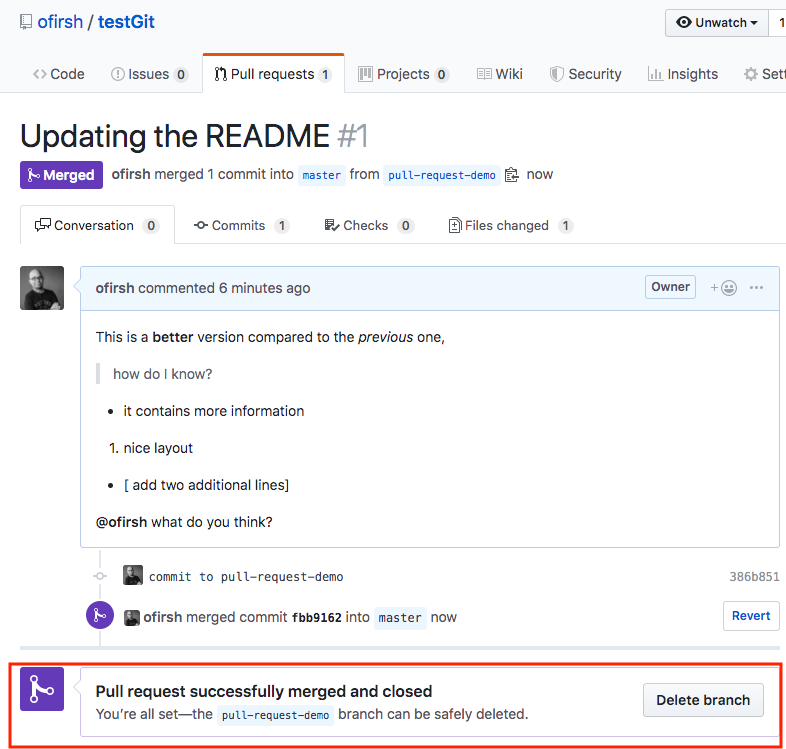
Lady Ada decides whether or not to merge the changes into her copy.
Creating a Pull Request
There are 2 main work flows when dealing with pull requests:
First, we will need to create a branch from the latest commit on master. Make sure your repository is up to date first using
git pull origin master
To create a branch, use git checkout -b <new-branch-name> [<base-branch-name>], where base-branch-name is optional and defaults to master. I’m going to create a new branch called pull-request-demo from the master branch and push it to github.
git add README.md
git commit -m 'commit to pull-request-demo'
…and push your new commit back up to your copy of the repo on GitHub:
git push --set-upstream origin pull-request-demo
Back to the web interface:
You can press the “Compare”, and now you can create the pull request:
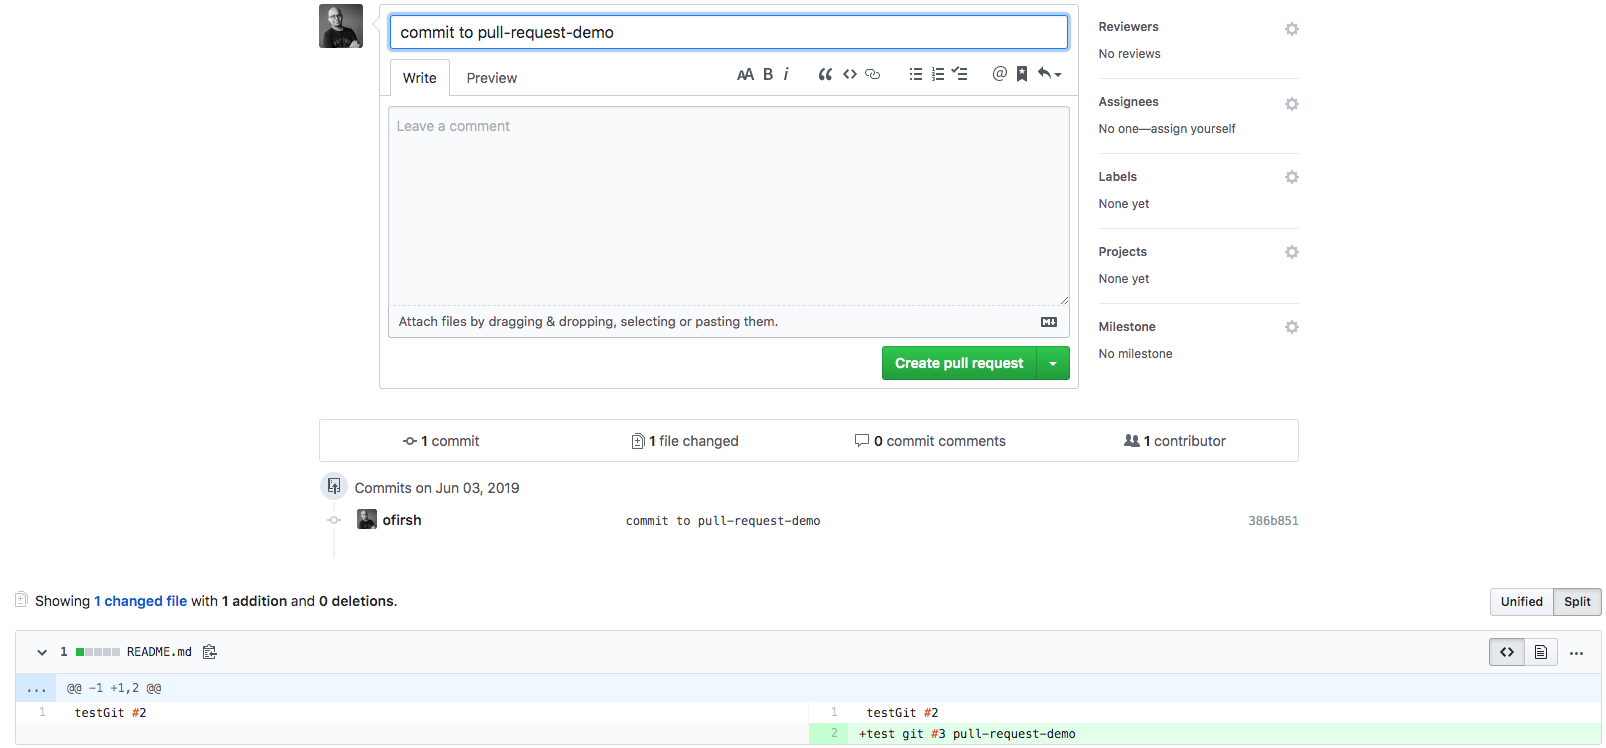
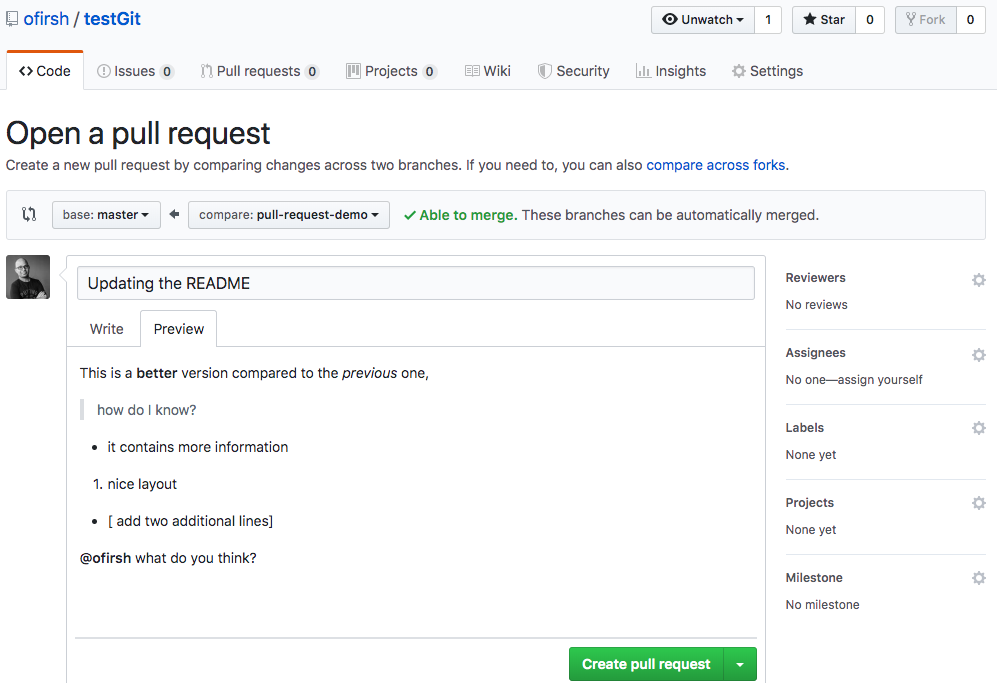
Go ahead and click the big green “Create Pull Request” button. You’ll get a form with space for a title and longer description:
Like most text inputs on GitHub, the description can be written in GitHub Flavored Markdown. Fill it out with a description of your changes. If you especially want a user’s attention in the pull request, you can use the “@username” syntax to mention them (just like on Twitter).
ImageMagick® is used to create, edit, compose, or convert bitmap images. It can read and write images in a variety of formats (over 200) including PNG, JPEG, GIF, HEIC, TIFF, DPX, EXR, WebP, Postscript, PDF, and SVG. Use ImageMagick to resize, flip, mirror, rotate, distort, shear and transform images, adjust image colors, apply various special effects, or draw text, lines, polygons, ellipses and Bézier curves.
Wand is a ctypes-based simple ImageMagick binding for Python, so go through the step-by-step guide on how to install it.
Let’s start by installing ImageMagic:
brew install imagemagick@6
Next, create a symbolic link, with the following command (replace <your specific 6 version> with your specific version):
ln -s /usr/local/Cellar/imagemagick@6/<your specific 6 version>/lib/libMagickWand-6.Q16.dylib /usr/local/lib/libMagickWand.dylib
It seems that ghostscript is not installed by default, so let’s install it:
brew install ghostscript
Now we will need to create a soft link to /usr/bin, but /usr/bin/ in OS X 10.11+ is protected.
Just follow these steps:
1. Reboot to Recovery Mode. Reboot and hold “Cmd + R” after start sound.
2. In Recovery Mode go to Utilities -> Terminal.
3. Run: csrutil disable
4. Reboot in Normal Mode.
5. Do the “sudo ln -s /usr/local/bin/gs /usr/bin/gs” in terminal.
6. Do the 1 and 2 step. In terminal enable back csrutil by run: csrutil enable
Step 1: Launch a new Finder window by choosing New Finder Window under the Finder’s File menu.
Step 2: Navigate to a desired file or folder and click the item in the Finder window while holding the Control (⌃) key, which will bring up a contextual menu populated with various file-related operations.
Step 3: Now hold down the Option (⌥) key to reveal a hidden option in the contextual menu, labeled “Copy (file/folder name) as Pathname”.
Step 4: Selecting this option will copy the complete, not relative, pathname of your item into the system clipboard.
In order to load your preferences, bash runs the contents of the .bashrc file at each launch. This shell script is found in each user’s home directory. It’s used to save and load your terminal preferences and environmental variables.
Show hidden files in Terminal
ls -la
nano ~/.bashrc
Any changes you make to bashrc will be applied next time you launch terminal. If you want to apply them immediately, run the command below:
Install Homebew, a free and open-source software package management system that simplifies the installation of software on Apple’s macOS operating system.
Go to Eclipse > Preferences > General > Editors > Text Editors > Annotations. Select Warnings option in the Annotation Types list box and un-select Vertical Ruler