Installing Flutter for iOS and Android on M1 Macbook

What is Flutter?

Flutter is Google’s UI toolkit for building beautiful, natively compiled applications for mobile, web, and desktop from a single codebase.

Installing Flutter’s SDK

  • Downloaded the Flutter SDK (version 1.22.5) to the desired location and extract the file. As an example if the file is downloaded to ~/Documents/develop/flutter_install, run:
cd ~/Documents/develop/flutter_install
unzip ~/Documents/develop/flutter_install/flutter_macos_1.22.5-stable.zip
  • Update your path. For ZSH, update ~.zshrc
nano ~/.zshrc

export PATH="$PATH:$HOME/Documents/develop/flutter_install/flutter/bin"
  • To refresh the current window, run:
source ~/.zshrc 

or open a new terminal window to automatically source the file.

  • Verify that the flutter/bin directory is now in your PATH by running:
echo $PATH
  • Verify that the flutter and dart commands are available by running:
which flutter dart

Link to the Flutter document

Installing Xcode and the iOS SDK

To develop Flutter apps for iOS, you need a Mac with Xcode installed.

  • Install Xcode from the Apple App store
  • To prepare to run and test your Flutter app on the iOS simulator, run
open -a Simulator

Installing Android Studio

Flutter relies on a full installation of Android Studio to supply its Android platform dependencies.

  • Download and install Android Studio.
  • Start Android Studio, and go through the ‘Android Studio Setup Wizard’. This installs the latest Android SDK, Android SDK Command-line Tools, and Android SDK Build-Tools.
  • Install the Flutter plugin for Android Studio
    • Open plugin preferences (Configure > Plugins)
  • Select the Fultter plugin and click Install
  • The Flutter plugin requires the Dart plugin to be installed, click Install
  • Restart Android Studio when prompted
  • Run the following command and press y to accept every license.
flutter doctor --android-licenses

Create a Flutter app from template

  • Create an empty directory for your Flutter apps. As an example
mkdir ~/Documents/develop/flutter
cd ~/Documents/develop/flutter
  • Use the flutter create command to create a new project:
flutter create calc
cd calc
  • Ensure that the iOS simulator is up and running
open -a Simulator
  • Run the app with the following command:
flutter run

Running the code on M1 Macbook Pro

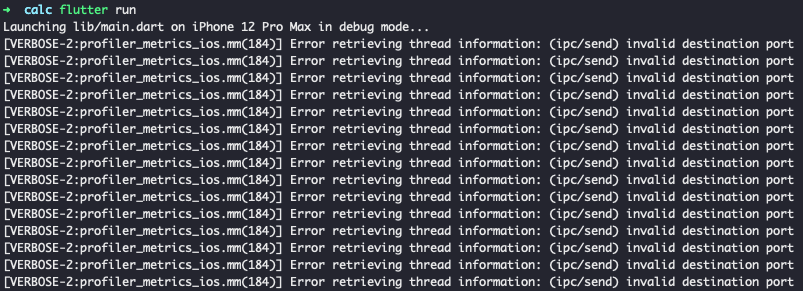
If you encounter the following error message:

[VERBOSE-2:profiler_metrics_ios.mm(184)] Error retrieving thread information: (ipc/send) invalid destination port

Switch to the beta branch, released at the beginning of the month, usually the first Monday. This will include a branch for Dart, the Engine and the Framework.

flutter channel beta
flutter upgrade
flutter clean
flutter run

If everything works well, there will be no error messages

Happy Fluttering!

Android Studio Tips and Tricks

Editor Actions

If you’re unfamiliar with using Android Studio and the IntelliJ IDEA interface, this page provides some tips to help you get started with some of the most common tasks and productivity enhancements.

[table id=1 /]

It is always useful to visit Android Studio -> Preferences -> Keymap for the full list of shortcuts

Keymap

Tick Android Studio -> Preferences -> Editor -> General -> Appearance -> Show line number 


Modify the Shell Path in OSX to Access adb Through Terminal

The shell path for a user in OSX is a set of locations in the filing system whereby the user can use certain applications, commands and programs without the need to specify the full path to that command or program in the Terminal. This will work in all OSX operating systems.

You can find out whats in your path by launching Terminal in Applications/Utilities and entering:

echo $PATH

Adding in a Permanent Location

To make the new path stick permanently you need to create a .bash_profile file in your home directory and set the path there. This file control various Terminal environment preferences including the path.

nano  ~/.bash_profile

Create the .bash_profile file with a command line editor called nano

export PATH="/Users/ofir/Library/Android/sdk/platform-tools:$PATH"

Add in the above line which declares the new location /Users/ofir/Library/Android/sdk/platform-tools as well as the original path declared as $PATH.

So now when the Terminal is relaunched or a new window made and you check the the path by

echo $PATH

You will get the new path at the front followed by the default path locations, all the time

/Users/ofir/Library/Android/sdk/platform-tools:/usr/local/bin:/usr/bin:/bin:/usr/sbin:/sbin:/opt/X11/bin:/usr/local/git/bin


Bluetooth Debugging on Android Wear

I’ve just bought a new ASUS ZenWatch and I’m working on a small application to extract the sensors data from the watch.

This post ( http://developer.android.com/training/wearables/apps/bt-debugging.html ) is describing the basic steps required to setup a device for debugging and to setup a debugging session. I’ve listed below some additional steps to help with the troubleshooting if things doesn’t work as planned.

Android Debug Bridge (adb)

Android Debug Bridge (adb) is a versatile command line tool that lets you communicate with an emulator instance or connected Android-powered device. It is a client-server program that includes three components:

  • A client, which runs on your development machine. You can invoke a client from a shell by issuing an adb command. Other Android tools such as DDMS also create adb clients.
  • A server, which runs as a background process on your development machine. The server manages communication between the client and the adb daemon running on an emulator or device.
  • A daemon, which runs as a background process on each emulator or device instance.

Setup Devices for Debugging


  1. Enable USB debugging on the handheld:
    • Open the Settings app and scroll to the bottom.
    • If it doesn’t have a Developer Options setting, tap About Phone (or About Tablet), scroll to the bottom, and tap the build number 7 times.
    • Go back and tap Developer Options.
    • Enable USB debugging.
  2. Enable Bluetooth debugging on the wearable:
    1. Tap the home screen twice to bring up the Wear menu.
    2. Scroll to the bottom and tap Settings.
    3. Scroll to the bottom. If there’s no Developer Options item, tap About, and then tap the build number 7 times.
    4. Tap the Developer Options item.
    5. Enable Debug over Bluetooth.

Set Up a Debugging Session


  • On the handheld, open the Android Wear companion app.
  • Tap the menu on the top right and select Settings.
  • Enable Debugging over Bluetooth. You should see a tiny status summary appear under the option:
Host: disconnected
Target: connected
  • Connect the handheld to your machine over USB.
  • In the Android Studio open the Terminal (Alt+F12 Windows) and run:
    adb forward tcp:4444 localabstract:/adb-hub
    adb connect localhost:4444

    Note: You can use any available port that you have access to.

    • adb forward forwards socket connections from a specified local port to a specified remote port on the emulator/device instance. Map a socket through the phone that is paired to your Wear device.
    • adb connect will connect to the device
  • A message will appear on the phone to allow Wear Debugging, press OK

WearDebugger

  • In the Android Wear companion app, you should see the status change to:
Host: connected
Target: connected

Well, this is the happy flow.

While debugging I’ve encountered some issues, especially after disconnecting the phone from the USB cable.

First, print a list of all attached emulator/device instances:

adb devices
List of devices attached
LGD855bxxxxx  device

In this case you can see only the phone and not the watch, so you will need to execute

adb forward tcp:4444 localabstract:/adb-hub
adb connect localhost:4444

In other cases you may get the error message

error: more than one device/emulator

You may need to terminates the adb server process:

adb kill-server

Now you can execute the adb forward and adb connect commands

adb forward tcp:4444 localabstract:/adb-hub
adb connect localhost:4444

If you get an error message

error: device unauthorized.

Try revoking the permissions on the device – Developer options -> Revoke USB debugging authorizations. Then plug the device in and accept it again.


Implementation of the BlockingQueue Interface That Works Properly When Accessed via Multiple Threads

A BlockingQueue is typically used to have on thread produce objects, which another thread consumes. Here is a diagram that illustrates this principle:

blocking-queue
A BlockingQueue with one thread putting into it, and another thread taking from it.

The producing thread will keep producing new objects and insert them into the queue, until the queue reaches some upper bound on what it can contain. It’s limit, in other words. If the blocking queue reaches its upper limit, the producing thread is blocked while trying to insert the new object. It remains blocked until a consuming thread takes an object out of the queue.

The consuming thread keeps taking objects out of the blocking queue, and processes them. If the consuming thread tries to take an object out of an empty queue, the consuming thread is blocked until a producing thread puts an object into the queue.

BlockingQueue methods come in four forms, with different ways of handling operations that cannot be satisfied immediately, but may be satisfied at some point in the future: one throws an exception, the second returns a special value (either null or false, depending on the operation), the third blocks the current thread indefinitely until the operation can succeed, and the fourth blocks for only a given maximum time limit before giving up. These methods are summarized in the following table:

Throws exception Special value Blocks Times out
Insert add(e) offer(e) put(e) offer(e, time, unit)
Remove remove() poll() take() poll(time, unit)
Examine element() peek() not applicable not applicable

The code below defines an implementation of the BlockingQueue interface that works properly when accessed via multiple threads since it’s synchronized properly

class SimpleBlockingQueue<E> implements BlockingQueue<E> {
    /**
     * The queue consists of a List of E's.
     */
    final private List<E> mList;

Add a new E to the end of the queue, blocking if necessary for space to become available

 public void put(E e) throws InterruptedException {
        synchronized(this) {
            if (e == null)
                throw new NullPointerException();

            // Wait until the queue is not full.
            while (isFull()) {
                // System.out.println("BLOCKING ON PUT()");
                wait();
            }

            // Add e to the ArrayList.
            mList.add(e);
            
            // Notify that the queue may have changed state, e.g., "no
            // longer empty".
            notifyAll();
        }
    }

Remove the E at the front of the queue, blocking until there’s something in the queue

public E take() throws InterruptedException {
        synchronized(this) {
            // Wait until the queue is not empty.
            while (mList.isEmpty()) {
                // System.out.println("BLOCKING ON TAKE()");
                wait();
            }

            final E e = mList.remove(0);
        
            // Notify that the queue may have changed state, e.g., "no
            // longer full".
            notifyAll();
            return e;
        }
    }


Using Java Thread.join() as a simple barrier synchronizer [Android]

Starts a Thread for each element in the List of input Strings and uses Thread.join() to wait for all the Threads to finish. This implementation doesn’t require any Java synchronization mechanisms other than what’s provided by Thread

 private volatile List<String> mInput = null;

/**
* The array of words to find.
*/
final String[] mWordsToFind;

/**
* The List of worker Threads that were created.
*/
private List mWorkerThreads;

Launch process for each and every string

// This List holds Threads so they can be joined when their processing is done.
mWorkerThreads = new LinkedList();

// Create and start a Thread for each element in the
// mInput.
for (int i = 0; i < mInput.size(); ++i) {
    // Each Thread performs the processing designated by
    // the processInput() method of the worker Runnable.
    Thread t = new Thread(makeTask(i));

    // Add to the List of Threads to join.
    mWorkerThreads.add(t);

    // Start the Thread to process its input in the background.
    t.start();
}

Barrier synchronization: using thread.join() to wait for the completion of all the other threads

// Barrier synchronization.
for (Thread thread : mWorkerThreads)
   try 
   {
      thread.join();
   } 
      catch (InterruptedException e) 
   {
      printDebugging("join() interrupted");
   }

If t is a Thread object whose thread is currently executing,

t.join();

causes the current thread to pause execution until t‘s thread terminates.

Overloads of join allow the programmer to specify a waiting period.

Like sleep, join responds to an interrupt by exiting with an InterruptedException.

Based on https://github.com/douglascraigschmidt/LiveLessons/blob/master/ThreadJoinTest/src/ThreadJoinTest.java

Using The Device’s Accelerometer And Magnometer To Orient A Compass [Android]

Initialization

private String TAG = "SensorCompass";

// Sensors & SensorManager
private Sensor accelerometer;
private Sensor magnetometer;
private SensorManager mSensorManager;

// Storage for Sensor readings
private float[] mGravity = null;
private float[] mGeomagnetic = null;

// Rotation around the Z axis
private double mRotationInDegress;

OnCreate

protected void onCreate(Bundle savedInstanceState) {

		// ...

		// Get a reference to the SensorManager
		mSensorManager = (SensorManager) getSystemService(SENSOR_SERVICE);

		// Get a reference to the accelerometer
		accelerometer = mSensorManager
				.getDefaultSensor(Sensor.TYPE_ACCELEROMETER);

		// Get a reference to the magnetometer
		magnetometer = mSensorManager
				.getDefaultSensor(Sensor.TYPE_MAGNETIC_FIELD);

		// Exit unless both sensors are available
		if (null == accelerometer || null == magnetometer)
			finish();

	}

Register this class as a listener for the accelerometer events and for magnetometer events:

@Override
	protected void onResume() {
		super.onResume();


		// Register for sensor updates

		mSensorManager.registerListener(this, accelerometer,
				SensorManager.SENSOR_DELAY_NORMAL);

		mSensorManager.registerListener(this, magnetometer,
				SensorManager.SENSOR_DELAY_NORMAL);
	}

The onPause method unregister this class as a listener for all sesnors

@Override
protected void onPause() {
	super.onPause();

	// Unregister all sensors
	mSensorManager.unregisterListener(this);
}

The onSensorChanged method process the incoming sensors’ events

@Override
public void onSensorChanged(SensorEvent event) {

	// Acquire accelerometer event data
	
	if (event.sensor.getType() == Sensor.TYPE_ACCELEROMETER) {

		mGravity = new float[3];
		System.arraycopy(event.values, 0, mGravity, 0, 3);

	} 
	
	// Acquire magnetometer event data
	
	else if (event.sensor.getType() == Sensor.TYPE_MAGNETIC_FIELD) {

		mGeomagnetic = new float[3];
		System.arraycopy(event.values, 0, mGeomagnetic, 0, 3);

	}

	// If we have readings from both sensors then
	// use the readings to compute the device's orientation
	// and then update the display.

	if (mGravity != null && mGeomagnetic != null) {

		float rotationMatrix[] = new float[9];

		// Users the accelerometer and magnetometer readings
		// to compute the device's rotation with respect to
		// a real world coordinate system

		boolean success = SensorManager.getRotationMatrix(rotationMatrix,
				null, mGravity, mGeomagnetic);

		if (success) {

			float orientationMatrix[] = new float[3];

			// Returns the device's orientation given
			// the rotationMatrix

			SensorManager.getOrientation(rotationMatrix, orientationMatrix);

			// Get the rotation, measured in radians, around the Z-axis
			// Note: This assumes the device is held flat and parallel
			// to the ground

			float rotationInRadians = orientationMatrix[0];

			// Convert from radians to degrees
			mRotationInDegress = Math.toDegrees(rotationInRadians);

			// Request redraw
			mCompassArrow.invalidate();

			// Reset sensor event data arrays
			mGravity = mGeomagnetic = null;

		}
	}

}